Moving can be a challenge, especially when it comes to delicate items like picture frames. Whether you’re relocating across town or to a new city, knowing how to pack picture frames for moving is essential to avoid damage. Framed art, photographs, or mirrors need extra care to ensure they arrive safely. In this guide, we’ll explore the best way to pack picture frames for moving and break down the process into eight easy steps for every frame type.
Need Extra Space? Discover Our Flexible Storage Solutions!
5 common risks of moving framing art and photos

Before we dive into packing, it’s important to understand the risks involved in moving picture frames:
- Cracked glass from impact or pressure
- Scratches on the frame or glass due to improper wrapping
- Tears or wrinkles in the artwork or photo
- Water damage from exposure to moisture during the move
- Shattered glass causing damage to the artwork or surrounding items
Learn more: 21 Boho-Style Living Room Design and Decor Ideas
By addressing these risks and following the right techniques, you can prevent these common issues when packing picture frames.
Picture frames: Materials you need to pack them
Having the right materials is crucial for ensuring the safety of your picture frames during a move. Here’s what you’ll need:
- Sturdy picture moving boxes (various sizes)
- Bubble wrap or packing paper
- Packing tape
- Foam corner protectors
- Labels or markers for marking “Fragile.”
- Scissors or utility knife
- Cardboard sheets or cardboard separators
Learn more: How To Turn Unused Photos into Decorative Wall Murals
How To Pack Picture Frames For Moving: 8 Easy Steps
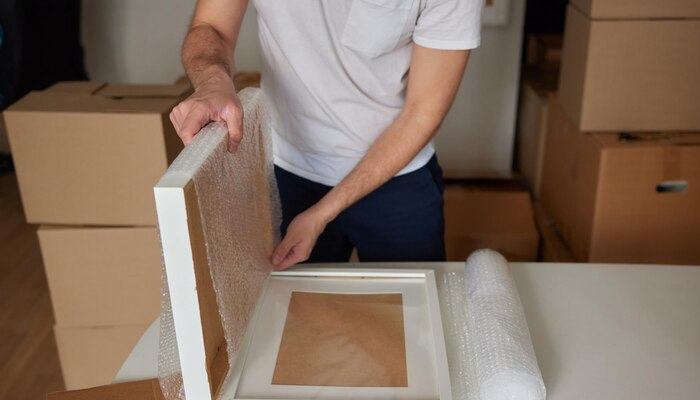
Step 1: Lay down a thick blanket on a flat surface.
Pick a flat surface that’s big enough to fit your picture frame and packing materials. Throw down a thick, cushiony blanket for added protection during the wrapping process.
Step 2: Get a mirror box, and tape one end closed.
The safest vessel for a picture frame is a specially designed mirror box, which is flatter and longer than regular moving boxes. Moving and office supply stores sell them, and Home Depot makes an especially heavy-duty line.
Each box should be slightly bigger — approximately 30% — than its designated frame(s).
For smaller picture frames, you can put more than one into each box. Just make sure to wrap each frame individually.
While the box is still folded, tape one end closed with packing tape. This will create a CD-case shape.
Learn more: 5 Best DIY Apartment Hacks
Step 3: Wrap the picture frame with packing paper.
Lay the frame, glass-side down, against the packing paper. Stretch one layer of packing paper around to the back of the frame, just like you would if you were wrapping a present.
Step 4: Secure with packing tape.
Tape around all the edges of the wrapped frame with packing tape. Use enough to tightly secure the packing paper.
Step 5: Repeat with bubble wrap.
Using bubble wrap over the packing paper, repeat steps 3 and 4.
Step 6: Stuff the bottom of the box with wadded-up packing paper.
This will protect the frame’s bottom.
Step 7: Insert the frame into the box.
Push the sides of the box together firmly. Fill any excess space with wadded packing paper. (This is the only time you’ll ever hear us say more space isn’t a good thing.)
Step 8: Tape the box shut with packing tape, and label it as “FRAGILE.”
Taping the box shut with packing tape ensures that the contents stay secure during transport, preventing the box from accidentally opening. Labeling it as “FRAGILE” alerts handlers to take extra care with the package, reducing the risk of damage or breakage. Together, these steps protect delicate items and ensure they arrive safely at their destination.
Learn more: How to Hang High Pictures Straight
What sizes of boxes are appropriate for what types of frames?
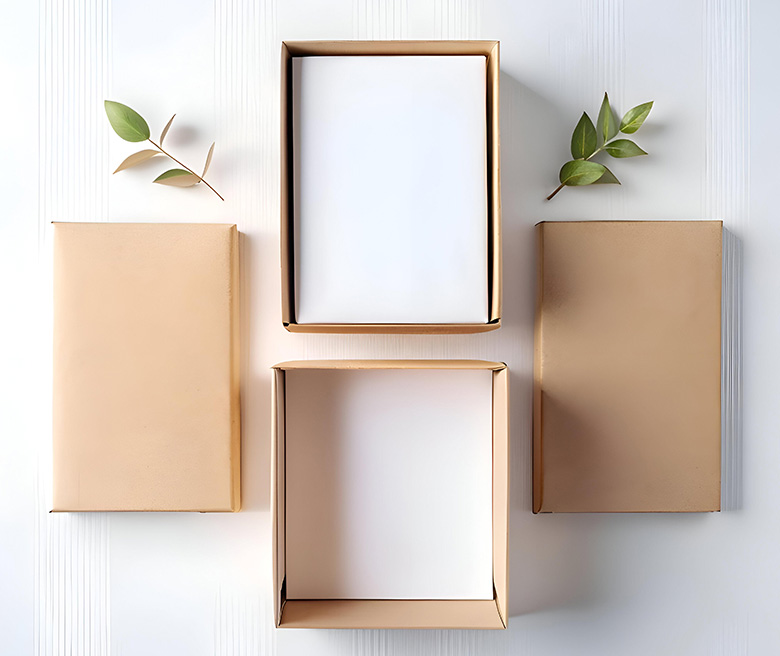
Choosing the correct box size is important for minimizing movement and preventing damage. The size of the boxes will depend on the type of frame:
- Normal photo frames: Small to medium-sized boxes that fit the dimensions of your frames, allowing for some padding.
- Antique frames: Medium to large boxes with enough space for extra protection layers.
- Fragile frames: Use specialty boxes, like mirror boxes, designed to offer extra support.
- Large frames: Use large picture moving boxes or telescopic boxes that can be adjusted to fit the frame.
Picture Frame Packing Guide (Step-by-Step)
Normal Photo Frames

- Wrap the frame: Start by wrapping the frame in bubble wrap or packing paper to protect the surface.
- Secure the corners: Use foam corner protectors to avoid damage.
- Pack the frame: Place the frame upright in the box, filling any gaps with additional packing paper or bubble wrap.
- Seal and label: Close the box securely with tape and label it as “Fragile.”
Antique Frames

- Wrap in a soft cloth: For antique frames, begin by wrapping the frame in a soft cloth before using bubble wrap for an added layer of protection.
- Reinforce the glass: Use tape in an “X” shape on the glass to prevent shattering.
- Add cardboard sheets: Insert cardboard sheets on either side of the frame for extra stability inside the box.
- Pack carefully: Place the frame in a large box, using more padding than normal frames.
Fragile Frames
- Use extra bubble wrap: For fragile or valuable frames, wrap in multiple layers of bubble wrap.
- Secure in a mirror box: Pack the frame into a mirror box or specialty box designed for fragile items.
- Double-check padding: Make sure there’s no movement inside the box by adding extra layers of padding.
Large Frames

- Disassemble if possible: For very large frames, it might help to disassemble parts if they’re designed to come apart.
- Use a telescopic box: Place the frame in a telescopic box, adjusting the size to fit.
- Protect edges and corners: Add extra corner protectors and padding at the edges.
Multiple Picture Frame Packing Tips
If you need to pack multiple frames together:
- Use cardboard separators between each frame to prevent them from touching.
- Stack frames upright, not flat, and ensure the box is tightly packed with padding to avoid shifting.
- Label the box clearly with “Fragile” and “This Side Up” markers to ensure careful handling.
Safely Unpacking Picture Frames
- When you reach your new home: Open the cartons carefully, cut the tape with the utility knife, and take care not to cut into the frames.
- Remove the frames step by step: Each frame will be taken out one at a time so that they do not fall accidentally.
- Check for Damage: Inspect each frame for any cracks or breaks within minutes of unpacking.
- Reassembled and hung: If the frames had been disassembled, reassemble them and hang the frames securely at the new location.
Need Extra Space? Discover Our Flexible Storage Solutions!
Conclusion
By following these steps and using the right materials, packing picture frames for moving becomes a simple and effective process. Whether you’re packing normal photo frames, antiques, or large, fragile pieces, these tips will help ensure your framed items arrive at your new home safely. The best way to pack picture frames for moving is all about planning and using the correct techniques—so your memories stay intact throughout the journey.
FAQs for How To Pack Picture Frames For Moving:
Q: Is using old newspapers a good option for wrapping picture frames?
While old newspapers can be used, it’s not the best choice as the ink may smudge onto your frames or artwork. Packing paper or bubble wrap offers better protection and is safer for valuable items.
Q: Which box size is ideal for packing large picture frames?
For large picture frames, it’s recommended to use a specialty mirror or picture box that is adjustable. These boxes are designed to provide the right fit and extra protection for delicate frames during transit.
Q: Should I remove artwork or photos from frames before packing them?
It’s generally a good idea to leave the artwork or photos in their frames to maintain protection. However, if the frames or glass are fragile, you may want to consider removing them and wrapping both the frame and artwork separately.
Q: Is it worth hiring a professional to pack valuable art frames?
If you’re dealing with expensive or sentimental artwork, hiring a professional is recommended. They use specialized packing materials and techniques that ensure your valuable frames are properly protected during the move.
Q: How can I safeguard the corners of picture frames during a move?
You can use corner protectors made of foam or cardboard specifically designed for picture frames. These help cushion the edges and prevent damage during handling and transport.


